Google Tag Assistant guide | Weboptim
Google Tag Assistant is a Chrome extension that identifies and examines Google tags on a website.
Among others, Google Analytics, Google Tag Manager, Adwords Conversion Tracking, Remarketing, Floodlight, etc.

But what is it good for?
It has several different functions:
- List the Google Tags on your website
- Shows code placement errors
- Provides useful tips and links for repair
- Records users' movements to identify configuration errors
How to use it?
1. Open your Chrome browser and install the Google Tag Assistant extension.
2. Install Google Analytics Debugger extension.
This extension uses a so-called debug version of Analytics to troubleshoot Analytics installation errors.
3. Make sure that you do not have any extensions installed on your browser that could prevent Analytics from working.
These should be turned off before using Tag Assistant, otherwise it will just show an error message. Check in the settings that the firewall is not blocking Google Analytics.
Important: Tag Assistant only works on pages that contain at least one Google tag.
4. Turn on the Debugger by clicking on its icon.
5. Turn on the Tag Assistant extension.
Click on it, then click on 'Enable' button. Refresh the page to receive the data.
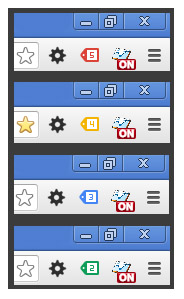
Your extension's icon can then have multiple colours:

If red, there are serious code-placement problems for one or more codes.
If yellow, then only minor placement problems are found.
If Blue, not all of the tags found are valid (for example, if you find more than one Analytics code on the website, the icon will be blue)
If Green, then each label is good and valid.
6. Right-click the icon, then click 'Settings' option.
7. A 'Level of detail' set all of them in part 'Detailed Information' for setting.
If you don't want to check certain tags, simply turn them off using the drop-down menu. Each time you change the settings, you will need to reload the page to receive the data.
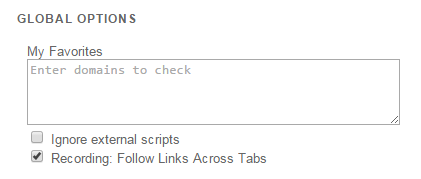
8. You can also click on the Tag Assistant icon to see a 'Options' ear.
Here we check that the 'Recording: Follow Links Across Tabs' field is checked.
If this option is not checked, pages opened in a new tab or window will not be saved.
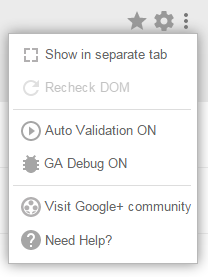
9. Click on Tag Assistant 'Menu' icon.

Check that the 'Auto Validation' and the 'GA Debug' should be switched on.
If Auto Validation is turned off, Tag Assistant does not automatically check pages.
If GA debug is disabled, Tag Assistant does not take information from Analytics, which is needed for detailed data.
10. Open the page you want to examine.
11. Click on the Tag Assistant icon, then click on 'Show in separate tab' option.
The results page will then open on the new page.
Whenever you move to another page in the browser or reload a page, the Tag Assistant results disappear. But if you open the results in a new tab, this will not happen.
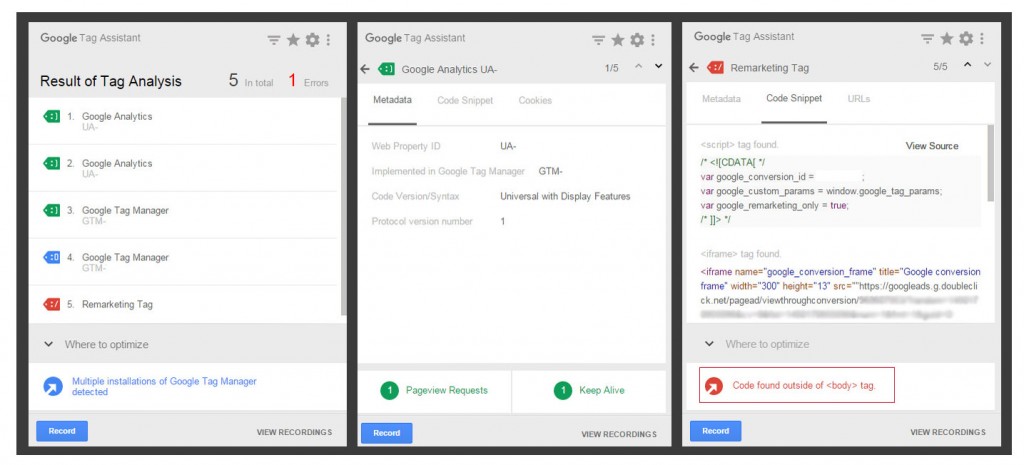
12. Look at the results.
What do the results show?
- That. go toy tag is located on the page.
- How many of these incorrect.
- What kind of member types are available on the site.
- How many Analytics code is on the page.
- How to we can fix out the mistakes.
- A 'Where to optimize' and in the section on notifications or the errors you can see.
- A 'Code snippet' box shows the current code snippet (where the error is located).
- If you click on a label more information are displayed about it, such as the Internet property ID, the tag manager container id, and the code version.
Google Tag Assistant is therefore an excellent tool for identifying and verifying codes on a website. Using it, you can easily detect code placement errors that may interfere with your Google Analytics measurements.
Source: optimizesmart.com

